How to Use Styles in Microsoft Word
Microsoft Word is a powerful tool with lots of features to help you format and style your documents. Styles are a great way to keep your docs looking professional and easy to read. Whether you’re writing a short letter or a complicated report, understanding how to use styles can save you time and keep your document organized.
Get Styles in Microsoft Word

IT Policies and Procedures Template Manual | ABR34M Information Security Policy Manual
Styles in Word let you quickly assign attributes like font size, color, alignment and spacing to different elements of your document – headings, paragraphs, lists, tables, etc. With one click, you can apply the same style to anything in your doc, so you don’t have to manually format each element.
The great thing about using styles is that they have a cascading effect. So, if you change one style, all places where it’s used will update automatically. That way, you can make global changes to your document in no time.
My colleague recently had to create a detailed report for a client in a hurry. He put styles to good use – headings for section titles, subheadings, and paragraph styles for different types of content.
Whenever the client made revisions, my colleague could easily update the entire document by modifying the style definitions. This saved him lots of time and kept the formatting consistent.
Understanding Styles in Microsoft Word
Let’s illustrate the power of styles. Imagine you need a table for sales data. Instead of formatting each cell one by one, use styles. This streamlines the process.
Define two styles: one for headers, and one for data cells. This enhances visual appeal and maintains clarity.
Did you know you can modify or create new styles in Microsoft Word? Customize them to match your needs for a personalized touch.
Here’s a story to show the importance of styles in MS Word. Bob was working on a team project. Each person used different formatting. The final document looked awful. Bob showed them the wonders of styles. With clicks, he transformed the chaos into a masterpiece. Bob taught an important lesson in document styling.
Styles are like a professional stylist for your documents. Without the cost or the small talk.
The Benefits of Using Styles
The perks of utilizing styles in Microsoft Word are plentiful and can vastly upgrade your document formatting experience. Here are five significant benefits that make using styles a game-changer:
- Consistency: Utilizing styles on your document guarantees a consistent look and feel across all content, be it headings, body text, or captions.
- Efficiency: With styles, you can alter the formatting of an entire document or certain sections with a few clicks. This saves precious time compared to manually adjusting each element one by one.
- Easy Updates: With styles, making global changes is a snap. If you opt to alter the font, size, or hue of your headings, simply modify the related style and all instances will be immediately updated.
- Accessibility: Styles help make documents more accessible to all users. By using built-in heading styles, for instance, screen readers can navigate through the document more effectively.
- Professional Appearance: Utilizing styles gives your document a refined and professional look. With consistent spacing, alignment, and formatting utilized throughout, your work will showcase itself with credibility and sophistication.
Moreover, advanced options within Microsoft Word offer more customization possibilities when working with styles. You can, for example, create custom styles tailored to your exact needs or adjust existing ones to meet unique requirements.
History narrates an interesting anecdote about the beginnings of using styles in writing software like Microsoft Word. In the early days of word processors, before the notion of “styles” existed as we know it today, changing formatting across a lengthy document was a laborious task.
Writers had to manually adjust each paragraph separately—quite time-consuming! The debut of styles revolutionized this process by enabling users to define formatting templates that could be quickly applied and changed throughout the entire document.
Using styles in Microsoft Word truly enables writers and boosts the overall formatting experience, making document creation more efficient and visually appealing. Tap into the power of styles to raise your work to new levels.
How to Apply and Modify Styles
Applying and modifying styles in Microsoft Word allows for consistent formatting and easy document organization. This guide will show you how to apply and modify styles in just five simple steps:
- Open your Microsoft Word document and navigate to the “Home” tab.
- In the “Styles” group, click on the “Styles” dialog box launcher, typically represented by a small arrow in the bottom-right corner of the group.
- In the Styles pane that appears, you will see a list of different style options. To apply a style to a paragraph or text, simply select the desired style from the list.
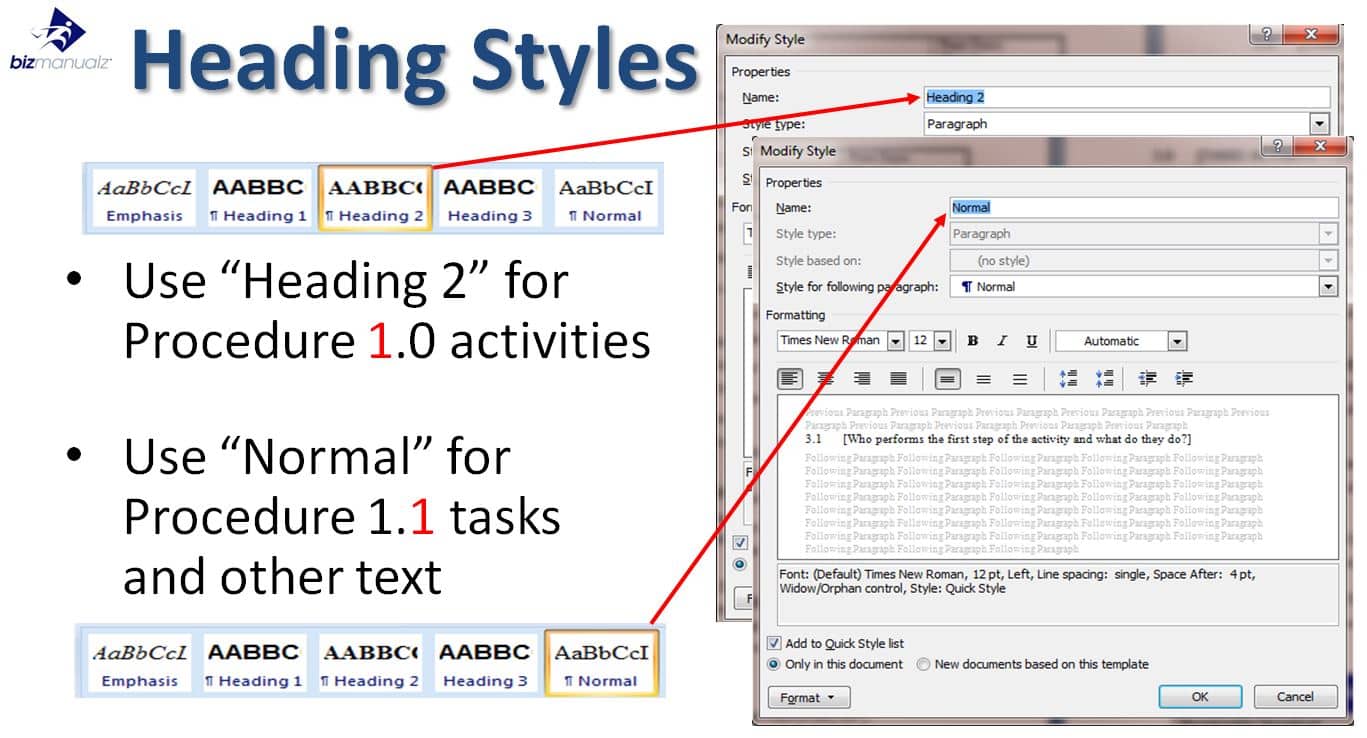
- If you want to modify an existing style, right-click on the style in the Styles pane and choose “Modify” from the dropdown menu. This will open the Modify Style dialog box where you can make changes to the formatting of the style.
- Once you have applied or modified your styles, simply select the text or paragraph you want to format and click on the appropriate style to apply it.
In addition, it’s important to note that styles can be customized further by adjusting font size, color, indentation, alignment, and other formatting options within the Modify Style dialog box.
Did you know that using styles can greatly simplify the editing process? By consistently applying and modifying styles, you can quickly make global formatting changes to your entire document with just a few clicks. This saves time and ensures a professional and cohesive look throughout your document. (Source: Microsoft Word Help Center)
Applying Styles to Because using bold and italics isn’t enough to make your words look fancy, let’s dive into the world of Microsoft Word styles, where you can make your text feel like it’s walking the red carpet of typography.
Applying Styles to Text
Highlight the text you want to style. Go to the top menu bar, click “Styles” and select a pre-defined style. It’ll be applied to the text instantly.
Or, customize existing styles or create new ones. Click on “Customize Style” in the dropdown. Try font type, size, color, indentation, spacing, etc.
Consistent styling is essential. Mixing font types or sizes can distract readers. Try different styles until you find one that resonates with your content. Take action today! Don’t let lifeless text stand between you and readers. Elevate your writing game. Give your document a makeover – style the text, not your hair!
Modifying Existing Styles
Modifying existing styles is a must-have skill for any designer who wants to make their content stand out. You can adjust elements of pre-existing styles, to add your own flavour. Let’s check out how.
In the table below, you’ll see some examples of how to modify styles.
| Selector | Property | Value |
|---|---|---|
| .header | background-color | #ff0000 |
| .paragraph | font-size | 18px |
| .button | border-radius | 5px |
You can target specific selectors to change properties like background-color, font-size and border-radius. This gives you full creative control over the look of your design.
Plus, there are many more ways to modify styles. For example, go wild with colors by changing the background-color property of different elements. Or, try different font families and sizes to find the perfect type for your project.
To demonstrate the power of modifying styles, let me tell you a story. A friend had a website with basic styling. After learning how to modify existing styles, he used bold colors and modern typography to completely transform his website. The result? A visually appealing website that drew more visitors and improved user engagement.
In conclusion, you can take ordinary designs and make them extraordinary by modifying existing styles. Unleash your creativity and watch your designs come alive!
Creating New Styles
You need to be able to make new styles if you want to work with style sheets. Here’s a guide to help you make one-of-a-kind styles:
- Choose the element: Pick the HTML element you want to style, like a heading or paragraph.
- Select attributes: Decide which features you want to adjust, like font size, color, or background. You can also add effects such as borders or shadows.
- Define the style: Use CSS selectors to identify the specific element, and add a new class or ID. That way, you can apply the style to multiple elements if needed.
- Set values: Assign values to the attributes you want to change. For example, for font color, put in the desired code or use predefined colors.
- Apply the style: Link your CSS file to your HTML doc using the
<link>tag in the<head>section. Then, use the class or ID attribute in your HTML tags to add your new style class or ID to the element.
Making new styles makes it easier to customize the look of your website while keeping consistency across many pages.
Pro Tip: Instead of starting from scratch, try modifying existing styles slightly. This can save time and keep your website consistent.
Organize styles using style sets – because even your formatting needs some style!
Organizing Styles with Style Sets
Style Sets in Microsoft Word allow users to organize and manage their styles effectively. This means they can apply consistent formatting across documents, creating a professional look. By grouping styles together, formatting is streamlined and consistency maintained.
To understand Style Sets better, consider this example. Say you are writing a research paper and need headings, subheadings, and text to be formatted the same. With Style Sets, you can create a table with each column representing a different style. E.g. the first column for main headings, the second for subheadings, and the third for body text.
Style Sets also update multiple style instances simultaneously. If you modify the formatting, such as font or color, the changes will be applied throughout the document. This saves time by not having to manually update each instance.
Microsoft Support (support.microsoft.com) states that using Style Sets in Word can increase productivity and create a professional document layout. Utilizing Quick Styles and Style Galleries can make formatting faster than ordering lunch!
Using Quick Styles and Style Galleries
- Streamline Formatting: Just a few clicks and you can give your document a professional look. Quick Styles offer formats like font, size, color, and alignment. Style Galleries let you pick from pre-defined styles.
- Customize and Create: In addition to the built-in styles, you can customize existing ones or make new ones as per your needs. This makes sure your documents have consistent branding or fit different purposes.
- Efficient Editing: Quick Styles and Style Galleries save time when editing or updating your document. Change the style of any text element and all instances of that style will update by modifying the quick style or gallery selection.
These features are not just for text formatting. You can use them for tables, graphics, headings, footnotes, etc. to keep a consistent look in your document.
A colleague of mine once had tight deadlines for a project. He had to make multiple reports with complex formatting. He was overwhelmed at first. But then he found out about Quick Styles and Style Galleries in Word. With this knowledge, he formatted his reports quickly and professionally. This saved him time and he completed his work ahead of schedule, getting praised by his team.
Quick Styles and Style Galleries are like having a personal stylist for your documents. No fashion advice needed!
Tips and Tricks for Efficient Style Use
Styles—a must-have for Microsoft Word since 1983. They make creating polished and professional documents easier. Here are some tips to help you get the most out of them:
- Customize: Change existing styles or make your own to have consistency throughout. Use the Format menu to change font, size, color, spacing, and alignment.
- Use galleries: Use the pre-designed style galleries to quickly apply a consistent format to headings, titles, body text, and more. This saves time and looks good.
- Update automatically: When making changes to a style, such as font size or indentation, Word lets you update it throughout the document automatically. This avoids manual adjustments.
- Create shortcuts: Assign keyboard shortcuts to frequently used styles for quick access. With a few keystrokes, you can apply the formatting without breaking your workflow.
These tips will help streamline document creation by using the power of Styles in Word. No more tedious formatting tasks! Plus, explore the advanced features of Styles like multilevel lists and table styles for consistent table formatting. This can make your document look even better.
Styles in Microsoft Word
Styles in Microsoft Word are super powerful! They let you format text and make documents look professional. We looked at the different types of styles available in Microsoft Word and how to use them. You can modify style attributes globally. This means if you change the font or color of a certain style, it will update throughout the entire document. This saves time and makes sure your document looks consistent.
Styles also make documents accessible. By using heading styles, you can generate a table of contents so readers can easily find what they need. Styles also help create organized and attractive layouts. It’s been part of Microsoft Word since the beginning. People have used styles since the early versions of Word, to save time and be more productive.
Frequently Asked Questions
 Q: What are styles in Microsoft Word?
A: Styles in Microsoft Word are predefined combinations of formatting settings that can be applied to text, paragraphs, or entire documents. They help maintain consistency and make it easier to format and update documents.
Q: How do I apply a style to text in Microsoft Word?
A: To apply a style to text, select the text you want to format, then go to the “Home” tab and choose a style from the “Styles” gallery. Alternatively, you can right-click on the style name in the “Styles” pane and select “Apply.”
Q: Can I modify existing styles or create my own in Microsoft Word?
A: Yes, you can modify existing styles or create your own styles in Microsoft Word. To modify a style, right-click on its name in the “Styles” pane and choose “Modify.” To create a new style, click on the “New Style” button in the “Styles” pane and define the formatting settings.
Q: How do I update the formatting of a style in Microsoft Word?
A: If you have made changes to the formatting of text that is using a style, you can update the style to reflect those changes. Right-click on the style name in the “Styles” pane, select “Update [Style] to Match Selection,” and it will be updated with the new formatting.
Q: Can I apply a style to only a portion of a paragraph in Microsoft Word?
A: Yes, you can apply a style to only a portion of a paragraph. Select the portion of the text within the paragraph, then apply the style using the methods mentioned earlier. The style will be applied specifically to the selected text.
Q: How do I clear formatting and revert to the default style in Microsoft Word?
A: To clear formatting and revert to the default style, select the text with the formatting you want to remove, then click on the “Clear Formatting” button in the “Font” group on the “Home” tab. The selected text will return to the default style.


Leave a Reply