How to Use Citations in Microsoft Word

To effectively use citations in Microsoft Word, familiarize yourself with the importance of incorporating citations in your work. This Introduction section delves into the significance and benefits of using citations. Explore the sub-sections – the Importance of using citations in Microsoft Word – to better understand how citations enhance the credibility and integrity of your writing. How to use citations in Microsoft word.
Importance of using citations in Microsoft Word

IT Policies and Procedures Template Manual | ABR34M Information Security Policy Manual
Citations in Microsoft Word are essential. They give credit to the original authors, show evidence for arguments, and allow readers to explore further. To make sure you use them correctly:
| 1. | Pick a well-known style, like APA or MLA. |
| 2. | Double-check the formatting. |
| 3. | Maintain a separate list of references. |
| 4. | Choose scholarly sources. |
By following these tips, you’ll boost the quality of your document and display your attention to detail. Citations are like ghost hunters – they always find a way to haunt your research!
Understanding Citations
To better understand citations in Microsoft Word, dive into the section “Understanding Citations.” Learn what citations are and why they are important by exploring the sub-sections “What are citations?” and “Why are citations important?” Discover how these solutions can enhance your writing and ensure proper attribution of sources.
What are citations?
Citations are essential for evidence and trustworthiness in scholarly work. They reference books, articles, websites and more. Without citations, it would be tough to decide if info is correct or reliable.
Let’s take a look at what citations are made up of:
| Citation Type | Description |
|---|---|
| Book citation | Author’s name, title, publisher and publication year. |
| Journal citation | Author’s name, article title, journal name, volume number, issue number, page range, and publication year. |
| Website citation | Author’s name (if available), webpage title, website name or publisher (if applicable), URL, and access date. |
Citations not only credit the creators but also help readers to find the same sources. By including citations, researchers make sure their work is transparent and follows academic integrity.
Fascinatingly, citations have been part of scholarly communication since ancient times. Philosophers like Aristotle credited their ideas by mentioning old thinkers in their works—the beginning of correct referencing.
Why are citations important?
Citations are key in academic writing. They give proof for the details shared. Referencing trustworthy sources builds credibility and believability to the points in a paper. This helps readers to verify the info, research further, and develop a full understanding.
Citations permit researchers to recognize the work of other scholars and use it to create new theories and ideas. It encourages collaboration and encourages intellectual growth.
In addition, citing correctly shields authors from potential accusations of plagiarism. It shows respect for intellectual property rights and prevents misinforming. Citing multiple sources backs up claims and strengthens their trustworthiness. Furthermore, citations provide readers with more reading materials, so they can explore different views on the topic.
True History:
Citations have been around for a long time. In ancient times, scholars hand-annotated books or scrolls to trace knowledge back to its source. If it weren’t for these practices, knowledge would be dispersed and progress would be blocked.
We still use citations today as a basis for academic research and communication. Citing is like hide and seek with your sources, but instead of counting to ten, you count to the year they were published.
How to Insert Citations in Microsoft Word
To insert citations in Microsoft Word, follow these steps: Access the References tab, choose a citation style, add a new source, insert in-text citations, and create a bibliography. Each step will be explained in detail to help you effectively use citations in your Microsoft Word documents.
Step 1: Accessing the References tab
To insert citations into your Microsoft Word document, you must first access the References tab. Here’s how to do it:
| 1. | Go to the top of the Word doc and click the “References” tab. |
| 2. | Scan for the “Citations & Bibliography” group in the toolbar. |
| 3. | In this group, you’ll find options to manage your citations, including add, edit, and format. |
| 4. | Put your cursor where you want the citation and click the “Insert Citation” button. |
| 5. | A drop-down menu will appear, giving you the choice of different citation styles and sources. |
Follow these extra tips to make your citation-inserting smoother:
- Know different citation styles and pick the one that fits your document.
- Utilize Word’s citation manager to organize and update your citations.
- Get plugins or add-ons that offer advanced citation features, such as auto-generating bibliographies or linking citations to external databases.
By following these tips and accessing the References tab easily, you can insert citations in your Microsoft Word docs without difficulty. It’s like selecting a font for your tombstone – it’s all about creating a lasting impression.
Step 2: Choosing a citation style
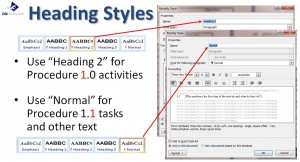
Procedure Heading Styles
Inserting citations in Microsoft Word can be difficult. To help, here’s a 3-step guide for choosing the right citation style.
- Step 1: Understand Different Citation Styles. Familiarize yourself with APA, MLA, Chicago, etc. Know their requirements and guidelines. Consider your document, discipline, and audience.
- Step 2: Assess Document Requirements. Follow any instructions or guidelines from your institution or editor. See if there are any specific citation styles required. Note preferences and expectations.
- Step 3: Consider Personal Preference. Think of which style aligns with your writing habits and workflow. Choose one that you find easy to use.
Remember, each citation style has unique features and variations. It all began in the 20th century to standardize references in scholarly writing. This helped increase clarity and accuracy in academic communities.
Over time, many formats developed based on discipline needs and conventions. Inserting citations in Microsoft Word is like finding a needle in a haystack. Except the haystack is your bibliography and the needle is correct formatting.
Step 3: Adding a new source
Adding a new source to your Microsoft Word document is essential for creating precise and correctly-cited documents. Follow this 3-step guide for a smooth source addition.
- Step 1: Go to the top of the page and select the References tab.
- Step 2: Tap on “Insert Citation” to open a drop-down list.
- Step 3: Choose “Add New Source” and fill out the required data, like author name, title, and publication details in the given fields.
By following these steps, you guarantee that your sources are properly listed and can be easily included in your paper.
Remember to carefully fill in all the relevant information about each source you add. This will help you dodge citation mistakes and keep academic reliability throughout your work.
Pro Tip: Always double-check your citations before submitting your document. Accuracy is essential when citing! Never underrate the power of an accurately placed in-text citation – it’s like a tiny ninja quietly reminding your professor that you’re not making stuff up!
Step 4: Inserting in-text citations
Inserting in-text citations is a must for any Microsoft Word document. Here’s how to do it:
- Go to the spot where you want the citation – in a sentence or at the end of a paragraph.
- Click on the “References” tab.
- In the “Citations & Bibliography” group, click “Insert Citation”. A drop-down menu of citation styles will appear.
- Choose the style for your doc – APA or MLA for example. Then decide if you want to add a new source or use an existing one from your bibliography.
Accurately citing sources shows honesty and helps readers easily track down info. Some styles may have special formatting rules that can improve the look and function of citations.
Sarah was writing a paper when she needed more sources. She used Microsoft Word’s citation feature to add an in-text citation from an online article. Sarah’s professor liked her properly formatted and inserted citations. This earned her top marks.
Step 5: Creating a bibliography
Create a bibliography for your Word document with ease! Follow these five steps:
- Go to the “References” tab at the top.
- From the “Citations & Bibliography” section, select the desired style (e.g. APA or MLA).
- Put your cursor where you want the bibliography, then click the “Bibliography” button. Choose either “Insert Bibliography” or “Insert Citations” accordingly.
- For individual citations, click on the “Insert Citation” button. Select the sources and click “OK” to insert them.
- Track sources and give proper credit with a bibliography.
Fun Fact: Properly formatted citations and bibliographies increase the credibility of an academic paper! So, master the art of citations in Word for that ‘academic brilliance’ effect.
Tips for Using Citations Effectively
To effectively use citations in Microsoft Word for a seamless and hassle-free writing experience, follow these tips. Organizing your sources, avoiding plagiarism, and updating and editing citations are the key sub-sections that will provide you with practical solutions to enhance your citation management skills.
Organizing your sources
Categorize sources by type, e.g. books, journal articles, websites. This makes them easier to find. Create a numbering or naming system for each source. Digital tools like reference management software can store and organize sources. Note key info: author’s name, publication date, page numbers, quotes, etc.
Group sources by themes for streamlining. Update & review organization regularly for research support.
Pro Tip: Use color-coding or labeling for quick source identification. Plagiarism: never copy anyone else’s work!
Avoiding plagiarism
Plagiarism is a serious academic offense that must be avoided at all costs. Here are some tips to stay away from this unethical practice:
- Know the Consequences: Plagiarism can lead to serious consequences, such as failing grades and disciplinary action. Take it seriously and focus on originality.
- Cite Sources: Always give credit to the work of others by including proper citations. This shows integrity and gives credit where it is due.
- Quote: When quoting someone else’s words or ideas, use quotation marks and provide an accurate citation. This shows transparency and respect for intellectual property.
- Paraphrase: If you want to include someone else’s ideas in your own work, rephrase them in your own words while still citing the original source. Don’t copy the exact wording or structure.
- Keep Track: Maintain a comprehensive record of all the sources you consult during your research. This makes it easier to create accurate citations later on.
Also, timely revisions are important when integrating citations into your writing. Understanding different citation styles necessary for different disciplines can help you provide accurate references throughout your work.
Plagiarism detection tools like Turnitin have been proven effective in many educational institutions worldwide. By following these guidelines and adopting good citation practices, you can make sure your work showcases originality and honesty while avoiding any accusations of plagiarism. Remember, being true to yourself as a writer is essential!
Updating and editing citations
To make citation editing easier, follow these tips:
- Examine sources carefully before including them.
- Use reference management software to organize and simplify citation work.
- Ask friends, professors, or librarians for help with complex citations.
By using these tips, you can edit citations correctly and precisely. It will improve the scholarly quality of your work. Citing correctly is like throwing a dinner party – you must give credit where it’s due to avoid any plagiarism disputes.
Citations in Microsoft Word
Citations are essential in academic writing. Using them in Microsoft Word helps give your work credibility and professionalism. Always follow the formatting guidelines to avoid plagiarism.
To use citations in Microsoft Word, you must first know the citation style required. This could be APA, MLA, or any other style. Microsoft Word has built-in tools that make citations easy.
When adding citations to your document, insert them at the right places to support your ideas and give credit to your sources. Use the tool in Microsoft Word to insert references and format them correctly.
When compiling your reference list, make sure you include all necessary information for each source. This could include the author’s name, publication date, title of the article or book, and source details. Double-check for accuracy.
Accurate citations show academic integrity and allow readers to explore further into the topic. Not citing sources properly can lead to negative consequences like plagiarism or an unreliable work.
Frequently Asked Questions
 FAQs: How to Use Citations in Microsoft Word
Q1: How do I insert a citation in Microsoft Word?
A1: To insert a citation in Microsoft Word, go to the References tab and click on “Insert Citation” in the Citations & Bibliography section. Select the desired citation style, such as APA or MLA, and enter the required information. Click “OK” to insert the citation into your document.
Q2: Can I edit or remove a citation in my Word document?
A2: Yes, you can edit or remove a citation in your Word document. Simply right-click on the citation and choose the “Edit Source” option to modify the details. To remove a citation, select it and press the “Delete” key or choose the “Remove Citation” option from the Citations & Bibliography section.
Q3: What if I need to change the citation style of my document?
A3: Changing the citation style in Microsoft Word is easy. Go to the References tab and click on “Style” in the Citations & Bibliography section. Choose the new citation style from the drop-down menu. Word will automatically update the citations and bibliography according to the selected style.
Q4: How can I manage my sources and create a bibliography?
A4: Microsoft Word offers a built-in tool to manage sources and create a bibliography. On the References tab, click on “Manage Sources” in the Citations & Bibliography section. In the “Source Manager” window, you can add, edit, or delete sources. To generate a bibliography, place the cursor where you want it to appear and click on “Bibliography” in the Citations & Bibliography section.
Q5: Is it possible to add page numbers or additional information to citations?
A5: Yes, you can add page numbers or additional information to citations in Microsoft Word. After inserting a citation, click on it to select it. Then, click on “Edit Citation” in the Citations & Bibliography section. In the dialog box, you can add page numbers, suppress author names, and include other details as required.
Q6: Can I import citations from external reference management tools?
A6: Yes, Microsoft Word allows you to import citations from external reference management tools. Most popular reference managers, such as EndNote or Zotero, offer add-ins that integrate with Word. Install the relevant add-in and follow the instructions to import your citations into your Word document.


Leave a Reply