How to Insert Pictures in Microsoft Word
Microsoft Word – a powerful tool for crafting pro-looking documents with ease. Inserting pictures is a key feature and can spruce up your document’s visuals. Here, we’ll look into how to insert images, tweak size/position, and wrap text around them in Word. How to insert pictures in Microsoft word.
Get Insert Pictures in Microsoft Word

IT Policies and Procedures Template Manual | ABR34M Information Security Policy Manual
Inserting pictures? Click the ‘Insert’ tab, select ‘Pictures’, and pick an image from your files. Or drag and drop directly onto your doc. To resize/reposition, right-click the image and choose ‘Size and Position’. Want text to wrap around the picture? Right-click and select ‘Wrap Text’ – choose from ‘Square’ or ‘Behind Text’.
For best results, use high-res images. And get creative with layouts, like combining multiple images and aligning with text boxes/tables. Make your Word docs as eye-catching as your social media feed – because pics are worth a thousand WTFs!
Importance of inserting pictures in Microsoft Word documents
Want to make your Microsoft Word document really stand out? Inserting pictures is your key! From illustrating concepts to conveying emotions, they can enhance the overall visual appeal, making documents more engaging. Here are six reasons why:
| # | Reason |
|---|---|
| 1 | Illustrate concepts: Pictures simplify complex info and provide visual representation. |
| 2 | Enhance aesthetics: Break the monotony of text with creative images that capture the reader’s attention. |
| 3 | Convey emotions: Images have the power to evoke feelings, aiding in effective message delivery. |
| 4 | Show examples: They provide real-life evidence and demonstrations to make your point more convincing. |
| 5 | Create emphasis: Highlight the key areas of your document with relevant pictures. |
| 6 | Improve readability: Visual breaks make it easier for readers to consume information. |
Plus, accurately positioning images is essential for maintaining document integrity. And don’t forget the importance of choosing high-quality images and suitable file formats for compatibility.
Take this example: a marketing company used an infographic with eye-catching visuals to present their client proposal. The client was so impressed that they signed the contract! So when it comes to inserting pictures, don’t underestimate their power.
Step 1: Opening Microsoft Word and creating a new document
Ready to use Microsoft Word and create a new document? Here are five steps to get started:
- Open Word by clicking its icon or finding it in the Start menu.
- A blank document will appear. Select the ‘File’ tab in the upper left corner.
- From the dropdown menu, select ‘New’. This will open a list of templates and document types.
- Choose your desired option and Word will open a new document.
- Start adding pictures and unleash your creativity!
Plus, you can customize your default templates or use keyboard shortcuts for a quicker process.
Don’t miss out on the features Word has to offer. Time to explore, let your imagination run wild, and show off your computer skills!
Step 2: Inserting a picture from your computer
Learn to insert pictures in Microsoft Word like a pro! Follow these steps:
- Go to the page where you want to put the image.
- Click the ‘Insert’ tab.
- Select ‘Pictures’ from the ‘Illustrations’ section of the menu.
You can also resize the picture according to your needs. Just click on it and use the corner handles to change the size. Plus, you can hold down the Ctrl key to insert multiple images at one go!
Be creative with your visuals by applying various effects and styles. Right-click the image and choose ‘Format Picture’ to access these options. There you have it – an easy guide to inserting pictures into Microsoft Word. Get creative and explore all the possibilities!
Step 3: Adjusting the picture size and position
- To effectively adjust the size and position of a picture in Microsoft Word, try these six simple steps:
- Select the picture by clicking on it.
- Notice the circles or squares around its edges – these are called sizing handles.
- To change the size proportionally, drag a corner handle inward or outward.
- To only resize the height or width, drag a side handle.
- Drag the picture to the desired location in the document to reposition it.
- For precise alignment, select Format Picture from the menu options and choose an alignment option.
- For a quick makeover, there are also some tips.
- To save time and maintain consistency, hold down the Shift key while selecting multiple pictures, then adjust their sizes together.
- Right-click on a picture and select Wrap Text to make use of layout options such as In Line with Text, Square Wrapping, or Tight Wrapping.
By following these steps and suggestions, you can create eye-catching documents that communicate your message without any distractions or misalignments. It’s like applying makeup, but for Microsoft Word!
Step 4: Formatting and styling the picture
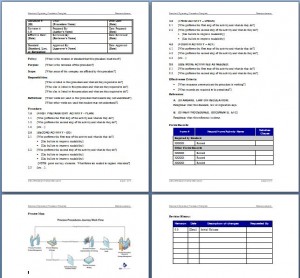
MS Word Procedure Template
When it comes to formatting and styling pictures in Microsoft Word, there are a few key steps:
- Click on the picture to activate the Picture Tools tab.
- Use the options to resize, crop, or rotate.
- To add a border, click on Picture Border and select the style, color, and width.
- Apply special effects or artistic filters using the Picture Effects option.
- Adjust brightness, contrast, and saturation levels with the Corrections option.
Note: Avoid overdoing it. Jane Roberts shared an anecdote about how she used picture formatting and styling techniques to create stunning visuals. She manipulated aspects such as brightness, contrast, and artistic effects to impress her audience. Finally, don’t forget to add captions or alt text to the picture.
Step 5: Adding captions or alt text to the picture
Adding captions and alt text to your pics in Microsoft Word is a must for improving the accessibility and understanding of your document. Captions provide a short description to help readers interpret the image, while alt text is for people with impaired vision using screen readers.
Here’s how to do it:
- Pick the pic: Click the image in your doc.
- Caption it: Under the “References” tab, click “Insert Caption” and type a short but descriptive caption.
- Alt text it: Right-click the image, select “Edit Alt Text”, and enter an accurate and concise description of the image’s content.
Remember to be clear and concise when writing captions and alt text – avoid technical jargon and context-specific details. It’s not just about art, it’s about including everyone. WebAIM research (2020) found that 59% of websites had issues with images lacking proper alternative text. So, have fun adding pics from the web – just don’t get too wild!
Step 6: Inserting pictures from an online source
To add images from the online world to Word, do this:
- Open Word and go to where you want to put the pic.
- Hit the ‘Insert’ tab on the top menu.
- Choose ‘Online Pictures‘ from the toolbar.
Pro Tip: Use good quality images to make your document look better! Word lets you organize pics like a digital Marie Kondo.
Step 7: Organizing and managing pictures in Word documents

Edit in Microsoft Word
Organizing and managing pictures in Word docs? Here’s a guide to get you started:
- Inserting: Click “Insert” tab in toolbar, select “Pictures”, choose image, click “Insert”.
- Resizing: Drag corners inward/outward or use Picture Tools Format tab for exact dimensions.
- Positioning: Click image, hold mouse button, drag it to desired location. Use layout options to align with text/other elements.
- Wrapping Select image, navigate to Picture Tools Format > Wrap Text. Choose “Square” or “Tight” for desired effect.
- Grouping: Select all images, hold Ctrl, right-click one, choose “Group” from menu.
Also, add captions, artistic effects, adjust brightness/contrast, or crop for better presentation. Organizing & managing pics makes docs more visually appealing & easy to read. Don’t miss out on making them engaging for maximum impact! Wrap up with a picture-perfect conclusion, ’cause text alone is dull as dishwater.
Pictures in Microsoft Word
Adding pics to Microsoft Word documents is an easy process. To do it, simply use the ‘Insert’ tab and select either ‘Picture’ or ‘Online Pictures’. Then, adjust size and alignment to your liking.
Word also offers formatting options for images. Change brightness, contrast, apply effects, crop, and add borders or frames. Make your visuals stand out! To really make an impact, use Word’s captioning feature. Add captions under your pics to give context and improve readability for your readers.
Frequently Asked Questions
 Q: How do I insert a picture in Microsoft Word?
A: To insert a picture in Microsoft Word, click on the “Insert” tab in the top menu, then select “Pictures” from the toolbar. Choose the image file you want to insert and click “Insert” to add it to your document.
Q: Can I resize the picture after inserting it in Microsoft Word?
A: Yes, you can resize the picture by selecting it, then clicking and dragging the corner handles. You can also right-click on the picture and choose “Size and Position” to specify exact dimensions.
Q: How can I align the picture in Microsoft Word?
A: To align the picture, select it and click on the “Format” tab in the top menu. In the “Arrange” group, you will find options to align the picture left, right, center, or justify it with the text.
Q: Is it possible to add a border to a picture in Microsoft Word?
A: Yes, you can add a border to a picture by selecting it and clicking on the “Format” tab. In the “Picture Styles” group, click on the “Picture Border” dropdown to choose a border style or customize it further.
Q: Can I crop a picture in Microsoft Word?
A: Absolutely! To crop a picture, select it and click on the “Format” tab. In the “Size” group, click on the “Crop” dropdown and choose the desired cropping option. Then, click and drag the handles to adjust the cropping area.
Q: Is there a way to wrap text around a picture in Microsoft Word?
A: Yes, you can wrap text around a picture by selecting the picture, clicking on the “Format” tab, and then choosing the desired text wrapping option from the “Wrap Text” dropdown menu.


Leave a Reply